Ways to Make Professional Packaging Labels for Less
14th Nov 2026
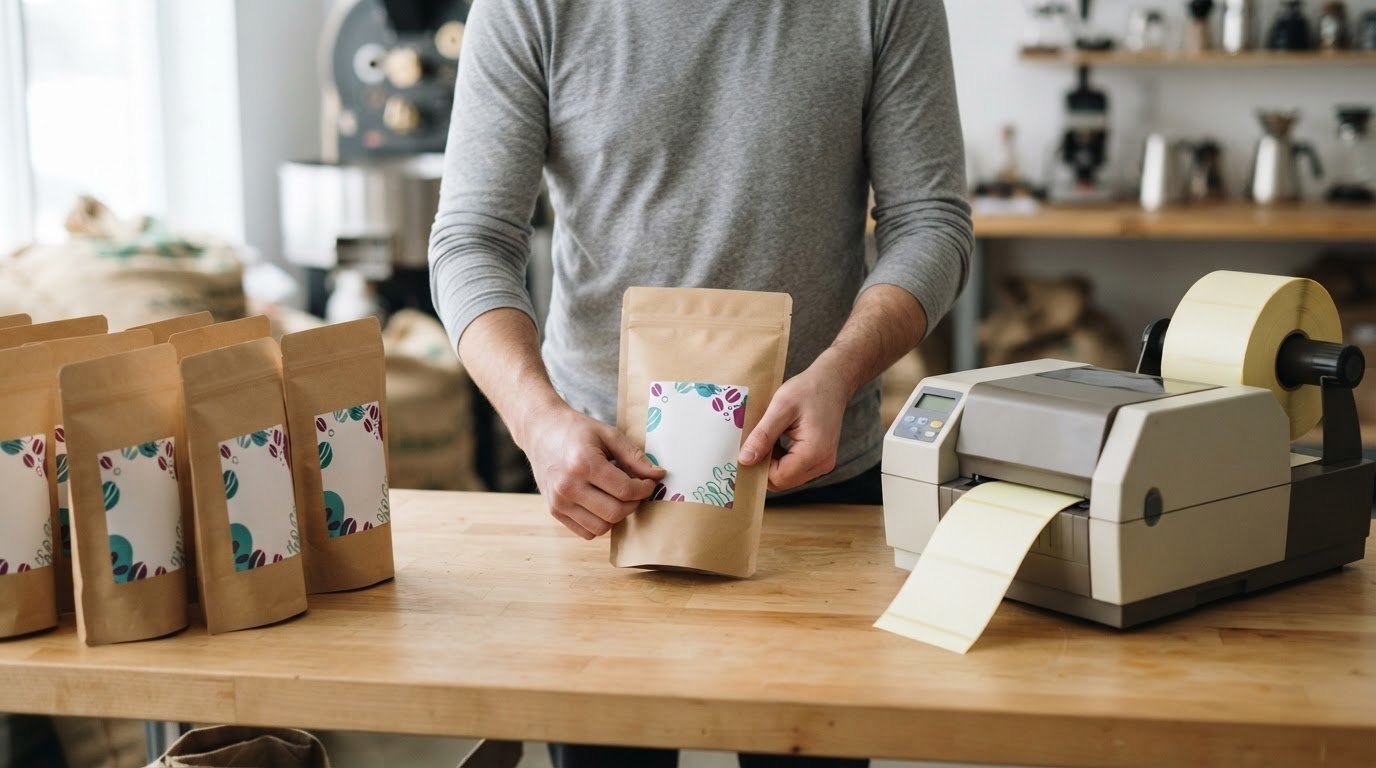
A professional-looking label doesn’t need an elaborate shape or crowded design. Learning how to make professional packaging labels on a budget starts with focused artwork and printing options suited to your order size. A restrained colour palette, a standard shape and digital printing can help control costs while making room for your logo and essential product details.
You can create polished packaging without spending your budget on unnecessary design complexity or excess stock. Make deliberate choices: establish a clear visual hierarchy, keep branding consistent, and choose a short digital run or a larger order based on your needs. This guide explains how design, print method and quantity work together, and how standard label shapes and thoughtful artwork can keep production practical while helping your product stand out.
Key Takeaways
- Keep label artwork focused, with clear branding and enough space for product details to remain easy to read.
- Choose digital printing when you need flexibility for short runs or expect designs to change.
- Use a standard label shape and size to simplify production, then consider whether ordering a larger quantity suits your demand.
- Match label materials and printing equipment to the product, how it will be handled, and the volume you need.
- Explore label makers, design software, and colour label printers to find an approach that fits your packaging workflow.
1. How Do You Implement Custom Packaging on a Budget?
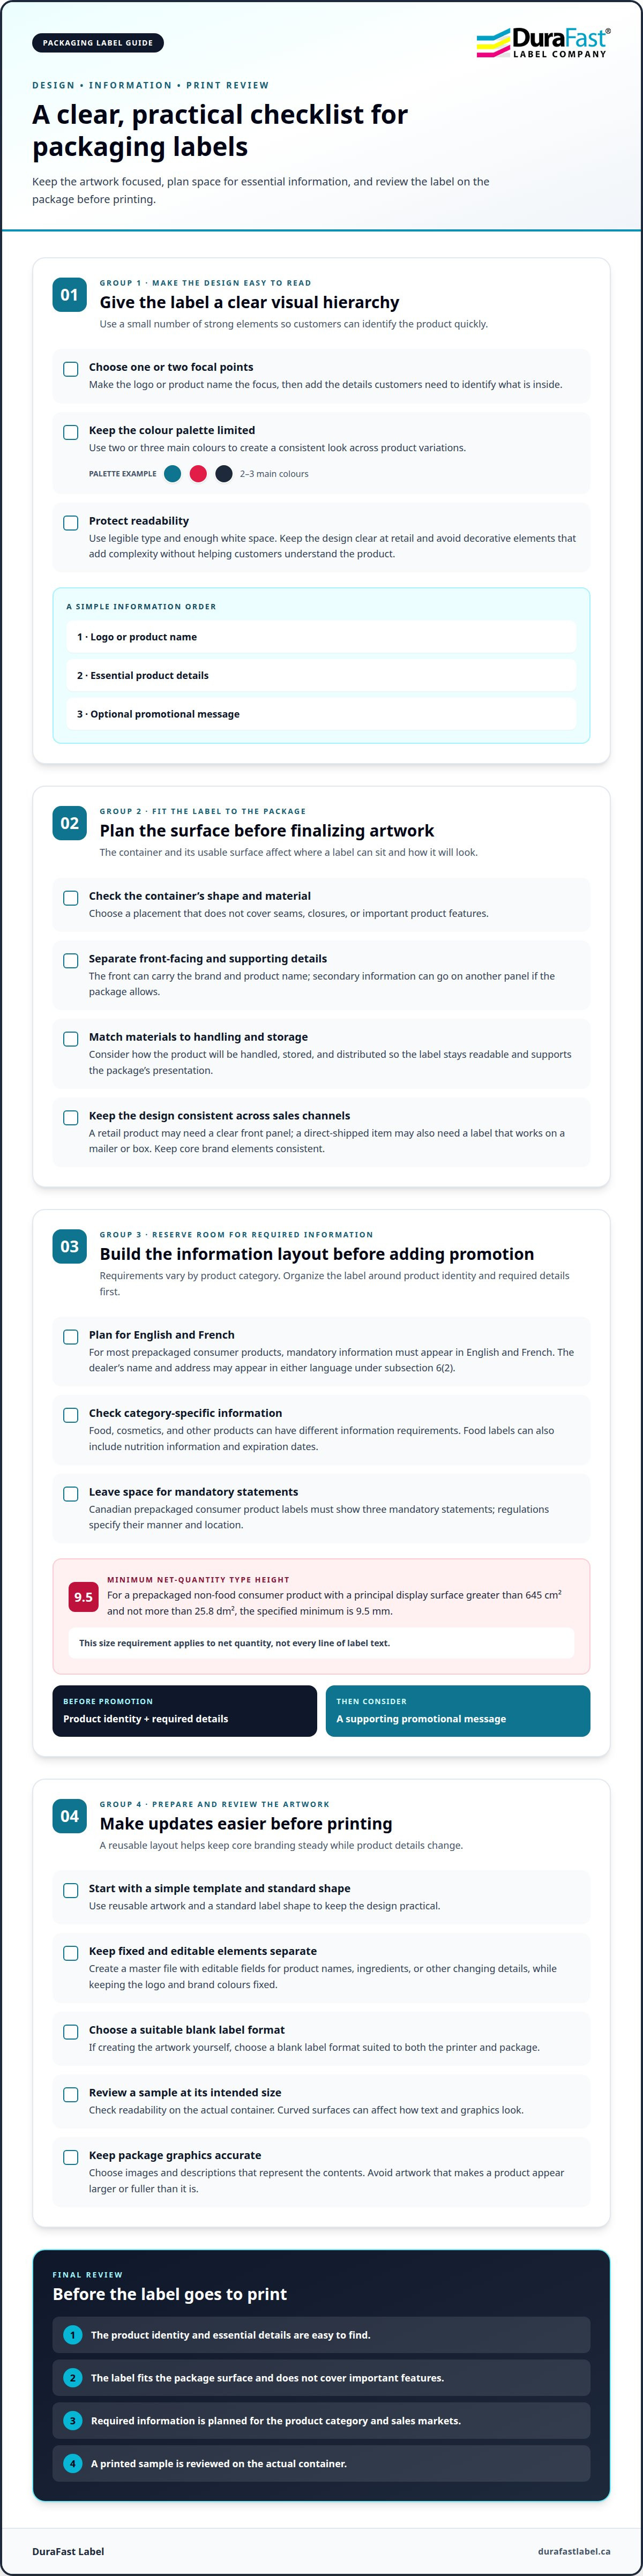
The most budget-conscious way to design professional-looking packaging labels is to use a simple template, a standard label shape and reusable artwork. Make your logo or product name the focal point, then include the details customers need to identify the product. A focused design avoids decorative elements that add complexity without helping customers understand what’s inside.
Build the label around one or two focal points, such as your logo and product name. A limited palette of two or three main colours can create a consistent look across product variations. Use legible type and enough white space to keep the design clear at retail. For example, a small jam maker might use one colour for the brand, another for the fruit, and the same layout for every flavour.
Plan the label and package together. The container’s shape, material and usable surface determine where a label can sit without covering seams, closures or important product features. A front-facing label can carry the brand and product name, with secondary information on another panel if the package allows. Choose materials to suit how the product will be handled, stored and distributed, so the label stays readable and supports the package’s presentation.
Design for the Canadian markets and sales channels your business serves. A product sold on a retail shelf may need a clear front panel, while an item shipped directly to customers may benefit from a label that also works on a mailer or box. Keep core brand elements consistent across both. For food labels, plan for the regions where the product will be sold and the channels used to distribute it.
Keep package graphics accurate. The Consumer Packaging and Labelling Act prohibits deceptive package design and display and addresses package fill level under section 9. Avoid artwork that makes a product appear larger or fuller than it is. Choose images and descriptions that represent the contents, and make sure the package’s appearance matches what customers receive.
Use label-design software or a ready-made template to set up the layout before printing. Create a master file with editable fields for product names, ingredients or other changing details, while keeping the logo and brand colours fixed. This reduces redesign work when you add a product. Blank labels can also help control costs when you create the artwork yourself. Choose a blank label format suited to your printer and package, then review a printed sample on the actual container, since curved surfaces can affect how text and graphics look.
2. Adding logos, product information, and promotional messages to labels
Canadian labelling requirements vary by product category. For most prepackaged consumer products, mandatory information must appear in English and French; under subsection 6(2), the dealer’s name and address may appear in either language. Food, cosmetics, and other products can have different information requirements, so organize the label around the product’s identity and required details before adding promotional content.
Start with a clear information hierarchy. Place the product identity, logo and essential details where customers can find them quickly. A salsa jar label, for example, might lead with the brand and product name, then use a separate area for ingredients and allergen information. Food labels can also include nutrition information and expiration dates. A promotional message should support the product’s main feature, not compete with these details.
Make room for required statements before selecting decorative graphics. Canadian prepackaged consumer product labels must show three mandatory statements, with their manner and location specified by the regulations. For a prepackaged non-food consumer product with a principal display surface greater than 645 cm² and not more than 25.8 dm², Department of Justice Canada specifies a minimum net-quantity type height of 9.5 mm. That requirement concerns net quantity, not every line of label text.
Use optional details only when they serve a clear purpose. A QR code can direct customers to product details or invite engagement, while a short promotional message can highlight a product feature. Give the code enough clear space to scan, and keep any accompanying instruction specific, such as “Scan for serving suggestions.” Retailers and distributors may require 12-digit scanner-readable UPCs, so reserve a distinct area for the code when your sales channel calls for one.
Check the layout at its intended print size. A statement that looks readable on a large computer screen may become crowded on a small container. Keep the logo and product identity distinct from supporting copy, and avoid placing text over busy graphics. If the label needs both English and French wording, allow space for both from the start rather than shrinking the text at the last minute.
Before printing, review the label against the product category, sales channel, and package surface. Separate mandatory information from optional brand messages in the design file, so updates don’t disrupt the layout. If you’re planning a label for a Canadian product, discuss your label requirements before finalizing the artwork.
3. Choosing digitally printed labels for lower minimum orders and quicker turnaround
Digital printing suits a business that needs a short label run, frequent artwork changes, or different product versions. It doesn’t require printing plates or dies, which can reduce setup expenses. Traditional methods often involve higher minimum orders, potentially leaving a small business with excess stock and cash tied up in labels. Digital printing can support shorter runs, variable data, and quicker design changes, so businesses can print closer to demand.
Consider how often product details change before choosing a printer or workflow. A small producer launching a seasonal flavour may need a short run, while a stable product line may suit a larger order. Digital label printers can also print variable information, such as batch numbers or expiration dates. Printing only what you need can help limit obsolete inventory when a product name, design or package changes.
Choose between a printing partner and an in-house setup based on label volume, artwork changes and material requirements. A business with a changing product line may value short-run flexibility; steady production may call for a workflow built around repeat orders. Digital printing can accommodate both, but the right choice depends on how often designs change and how labels fit into daily production. Request a proof before committing to a full run, then check colours, text and graphics at the intended label size.
Prepare artwork carefully to avoid preventable print problems. Set the design canvas to at least 300 DPI for crisp output. Add bleed, typically 0.125 inches, and keep essential text inside a safe area so trimming doesn’t cut into it. Check that small text remains legible and that colours and graphics reproduce as intended. A proof gives you a chance to catch a misplaced logo or incorrect product detail before printing the full quantity.
Common mistakes include using low-resolution artwork, placing text too close to the trim edge, and skipping a proof or alignment test. For label sheets, set printer scaling to 100% rather than “fit to page,” which can shift the design away from each label’s edges. Print a test sheet and inspect alignment before using the rest. If labels are applied by hand, a simple jig can help place each one consistently on the package.
Match label application to the scale of the job. Hand application can work for a small batch, while a jig helps keep placement consistent across packages. For larger quantities, automated labelling can improve precision and repeatability. Planning printing and application together helps reduce waste and maintain a consistent retail appearance.
If you’re planning a digital label workflow, discuss your printing requirements before settling on a production approach.
4. Using custom labels to brand products and packaging
A custom label can create a consistent brand across a plain box, bag, jar or mailer. Reusing the same logo, type style and colour treatment helps customers recognize the product across sales channels. For a small product line, one adaptable design can add branding without requiring a custom-printed box for every item. Change product-specific details while keeping the core identity consistent.
Choose label material according to the package and how the product will be stored, handled and shipped. A glass bottle has a different surface from a flexible pouch or shipping carton. The thickest or most expensive material isn’t automatically the right choice; it needs to suit the container and intended use. If environmental considerations matter to your brand, ask about recycled label materials and soy-based inks.
Use a label to customize stock packaging before committing to a larger-volume packaging change. A clear front label on a plain mailer, for example, can carry your brand while the rest of the package stays simple. For products with several variations, keep the layout consistent and change only the relevant details. This gives customers a recognizable experience while leaving room to adapt designs as your product line develops.
Plan barcodes as part of the layout, not as an afterthought. Place each product code on a flat, visible area where the package shape won’t distort it or interfere with scanning. Keep the barcode clear of folds, seams and overlapping labels, and test its position on the actual package before printing a full run. Canadian-issued product codes are suitable for use abroad, which can help businesses planning sales beyond Canada.
A qualifying Canadian test-market product may be exempt from bilingual labelling requirements for up to one year. During that period, distribution must be limited to local government units where at least 10 percent of residents have the official language used on the label as their mother tongue and fewer than 10 percent have the other official language as their mother tongue. Treat this as a limited exception, not a general alternative to bilingual labelling.
Use customer feedback to refine the finished package. If shoppers can’t find a product detail or recognize the brand on a shelf, adjust the label’s placement or information hierarchy. A test run on the intended package can show whether a QR code, logo or product name stays visible after handling. These observations help you decide which label elements deserve space as production grows.
5. Bulk ordering and standard label shapes
A larger batch can reduce the cost per label when suppliers offer volume discounts, but it also means holding more inventory. Unused labels can become waste if a product name, design or package changes. Estimate demand from your production schedule and likely product changes, then balance unit cost against storage and obsolescence risk. A new product with uncertain demand may suit smaller repeat orders, while a stable product line can make a bulk order more practical.
Standard shapes help simplify production. Rectangular product labels commonly use 2 x 3, 3 x 5, or 4 x 6 inches. Common circular diameters are 1.5, 2, or 3 inches. Square labels commonly measure 2 x 2, 3 x 3, or 4 x 4 inches, while oval options include 2 x 1, 3 x 2, or 4 x 2 inches. Choose based on the package’s flat surface and the space needed for product information.
A rectangle or circle can still support distinctive artwork. Use colour, typography and a clear logo to establish brand identity instead of relying on a custom outline. Standard shapes can avoid custom-die setup costs, while custom sizes may add setup charges. For example, a circle on a jar lid can carry a short brand message, while a rectangle on the jar’s side can hold product details.
Design one label layout for several related products when their information requirements allow it. Keep the brand elements fixed, then reserve an editable area for flavour, scent or size. This can reduce redesign and reordering. It works best when the products have compatible label requirements and package dimensions. Don’t force one design across packages if it makes text hard to read or leaves too little room for essential details.
Before ordering in bulk, review the finished label on the package itself. Check the dimensions against the available surface, then confirm the shape won’t cross a seam or wrap awkwardly around a curved container. A recyclable package may also need a label material suited to its disposal pathway. Consider the label and container together rather than choosing either in isolation.
Compare order quantities against storage capacity, product stability, and the likelihood of artwork changes. A lower per-label cost may not be useful if excess stock takes up space or becomes outdated. Standard sizes, repeatable layouts, and demand-based ordering help keep the decision grounded in real production needs. Discuss label quantities and formats for your packaging workflow.
DuraFast Label Company Canada: Brother P-touch label maker
DuraFast Label offers options for different packaging-label workflows, from compact label makers to colour label printers. A standard desktop label maker may suit straightforward labelling needs, while VIPColor or Afinia Label Printers can produce vibrant colour product labels. BarTender professional label design and barcoding software is another option for organizing label artwork and barcode information.
Choose based on the labels you produce, the detail they carry, and how often designs change. A simple workflow may call for a basic label maker, while product lines needing colour graphics may benefit from a colour label printer. If you’re deciding which option fits your packaging process, contact DuraFast Label Company Canada.
Put Your Label Plan Into Practice
Treat label production as an ongoing part of your packaging workflow, not a one-time design task. As products, sales channels and order volumes change, revisit what your labels need to communicate and how you produce them. This practical approach helps you learn how to make professional packaging labels on a budget while keeping future updates manageable.
For equipment options, DuraFast Label Company Canada offers VIPColor Label Printers, Afinia Label Printers, and Primera Label Printers. The right direction depends on your artwork, label materials, and production needs. A conversation about those requirements can help you consider an approach that fits your operation without overcomplicating the decision.
Contact DuraFast Label Company Canada to discuss your packaging label plans and next steps. With a clear idea of what your labels need to do, you can move forward confidently.
Frequently Asked Questions
How Do You Implement Custom Packaging on a Budget?
A practical way to learn how to make professional packaging labels on a budget is to test a small batch on the actual package first. Check whether the label stays visible during handling and whether its placement suits the container. This can reveal issues such as a lifting edge or text obscured by a seam before they affect a larger order. Note any adjustments needed for the next run.
What do I need to make labels?
You’ll need label artwork, a way to print it and label stock compatible with both the printer and package. Choose inkjet or thermal printing based on the equipment and materials in your workflow. Keep the original artwork file editable so you can update product details without rebuilding the layout. If you’re labelling many packages, plan a consistent placement method too.
Which free or low-cost label design software works well for small businesses?
Start with software you already have if it can set label dimensions and export artwork clearly. For recurring layouts with barcodes, BarTender professional label design and barcoding software is an option to consider. Compare tools based on your operation’s needs, such as managing product variations or barcode fields. Review licensing terms before choosing, since costs and included features can differ.
Is it cheaper to print labels at home or use a Canadian print shop?
The right choice depends on whether you already own compatible printing equipment, how many labels you need and how often the artwork changes. Home printing can suit small batches when you already have the equipment and supplies. A digital print run may be more practical for a larger batch without managing production in-house. Compare setup, materials, test prints and unused labels, not just the cost of printing.
Which label materials and adhesives are best for different products and storage conditions?
Match the label stock and adhesive to the package surface and expected conditions. A refrigerated container may face condensation, while a dry carton has different handling needs. Test the full combination on the actual package, including printing and application. Check that the label stays attached and readable during normal storage and handling. The right choice depends on the product, surface and environment.
What label size, resolution, bleed, and file formats do professional printers require?
Set label dimensions to the usable package surface and keep essential text away from trim edges. Artwork should be at least 300 DPI, with bleed typically set to 0.125 inches. File-format requirements vary with the printer and production workflow, so prepare artwork in a format that preserves its dimensions and graphics. Confirm scaling and output settings before printing to avoid unexpected resizing.
How can small businesses create barcodes and QR codes for packaging labels affordably?
Use a barcode tool to generate the code required for your product or sales channel, then place it in a clear, flat area. DuraFast Label Company Canada offers a Free Barcode Generator for barcode creation. QR codes can direct customers to product details or other useful information. Test each printed code with a scanner or phone on the finished package, not only on screen. For a small business learning how to make professional packaging labels on a budget, testing codes before a full run can prevent reprints.