Sealed Air Autobag Ribbons: A Buying Guide for Efficiency
11th Nov 2026
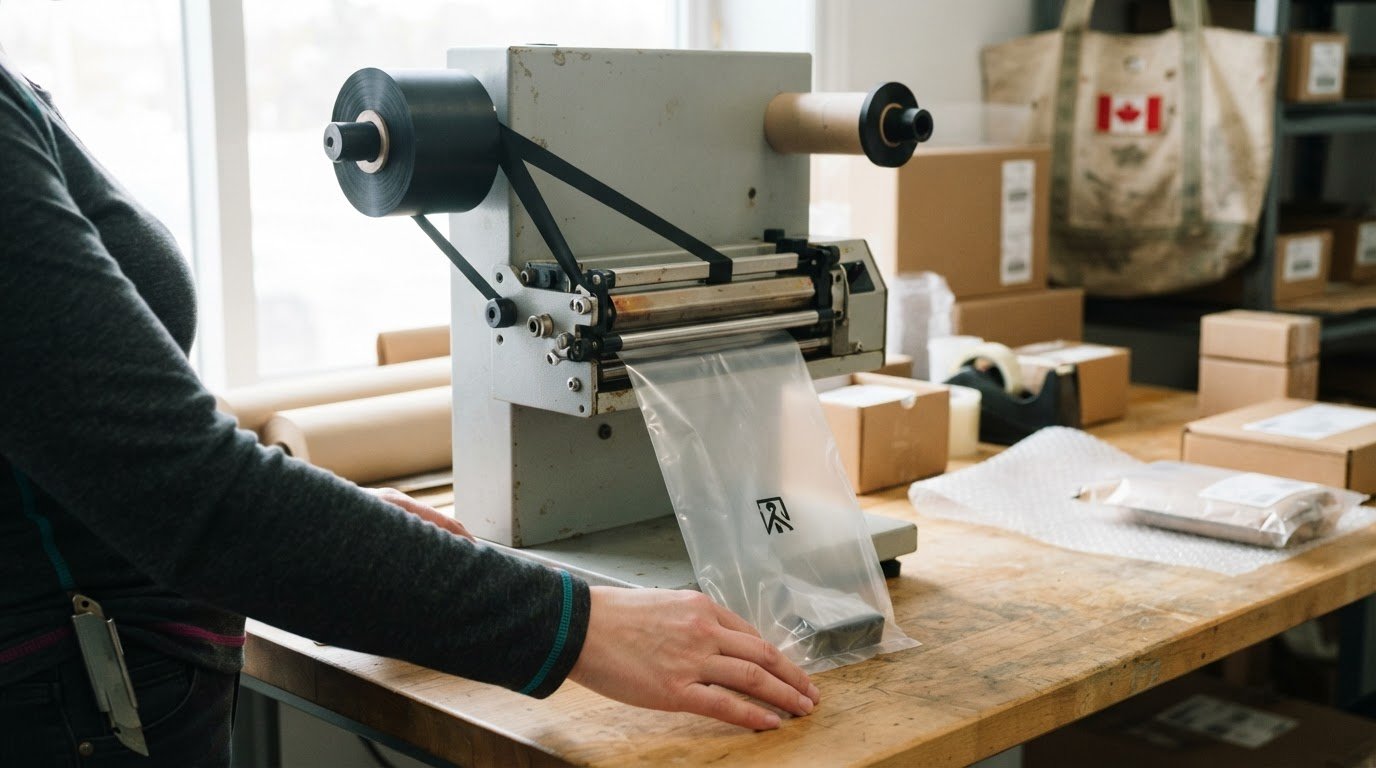
The ribbon that fits a printer isn’t automatically right for the bag. Choosing Sealed Air Autobag Ribbons means considering the printer’s requirements, the bag material and the imprinting application together.
Reliable print results depend on that match. Before selecting a ribbon, identify what the equipment and application require. This guide explains how to pair a ribbon with the printer and bag for your specific use.
Printing directly onto a bag can avoid the cost of an adhesive label and make the bag easier to recycle. This guide also covers AutoLabel UV, a resin-enhanced wax ribbon designed for most imprinting applications, and the practical details to consider when choosing a ribbon.
Key Takeaways
- Learn which equipment details matter when matching a ribbon to an Autobag machine.
- Understand how ribbon type and bag material influence the choice for your imprinting needs.
- Follow a clear approach to installing or replacing ribbon while keeping the machine setup in mind.
- Trace poor print quality or ribbon breaks to the parts of the setup that may need attention.
- Explore practical storage considerations to help maintain ribbon condition between uses.
Matching ribbons to bags and printers
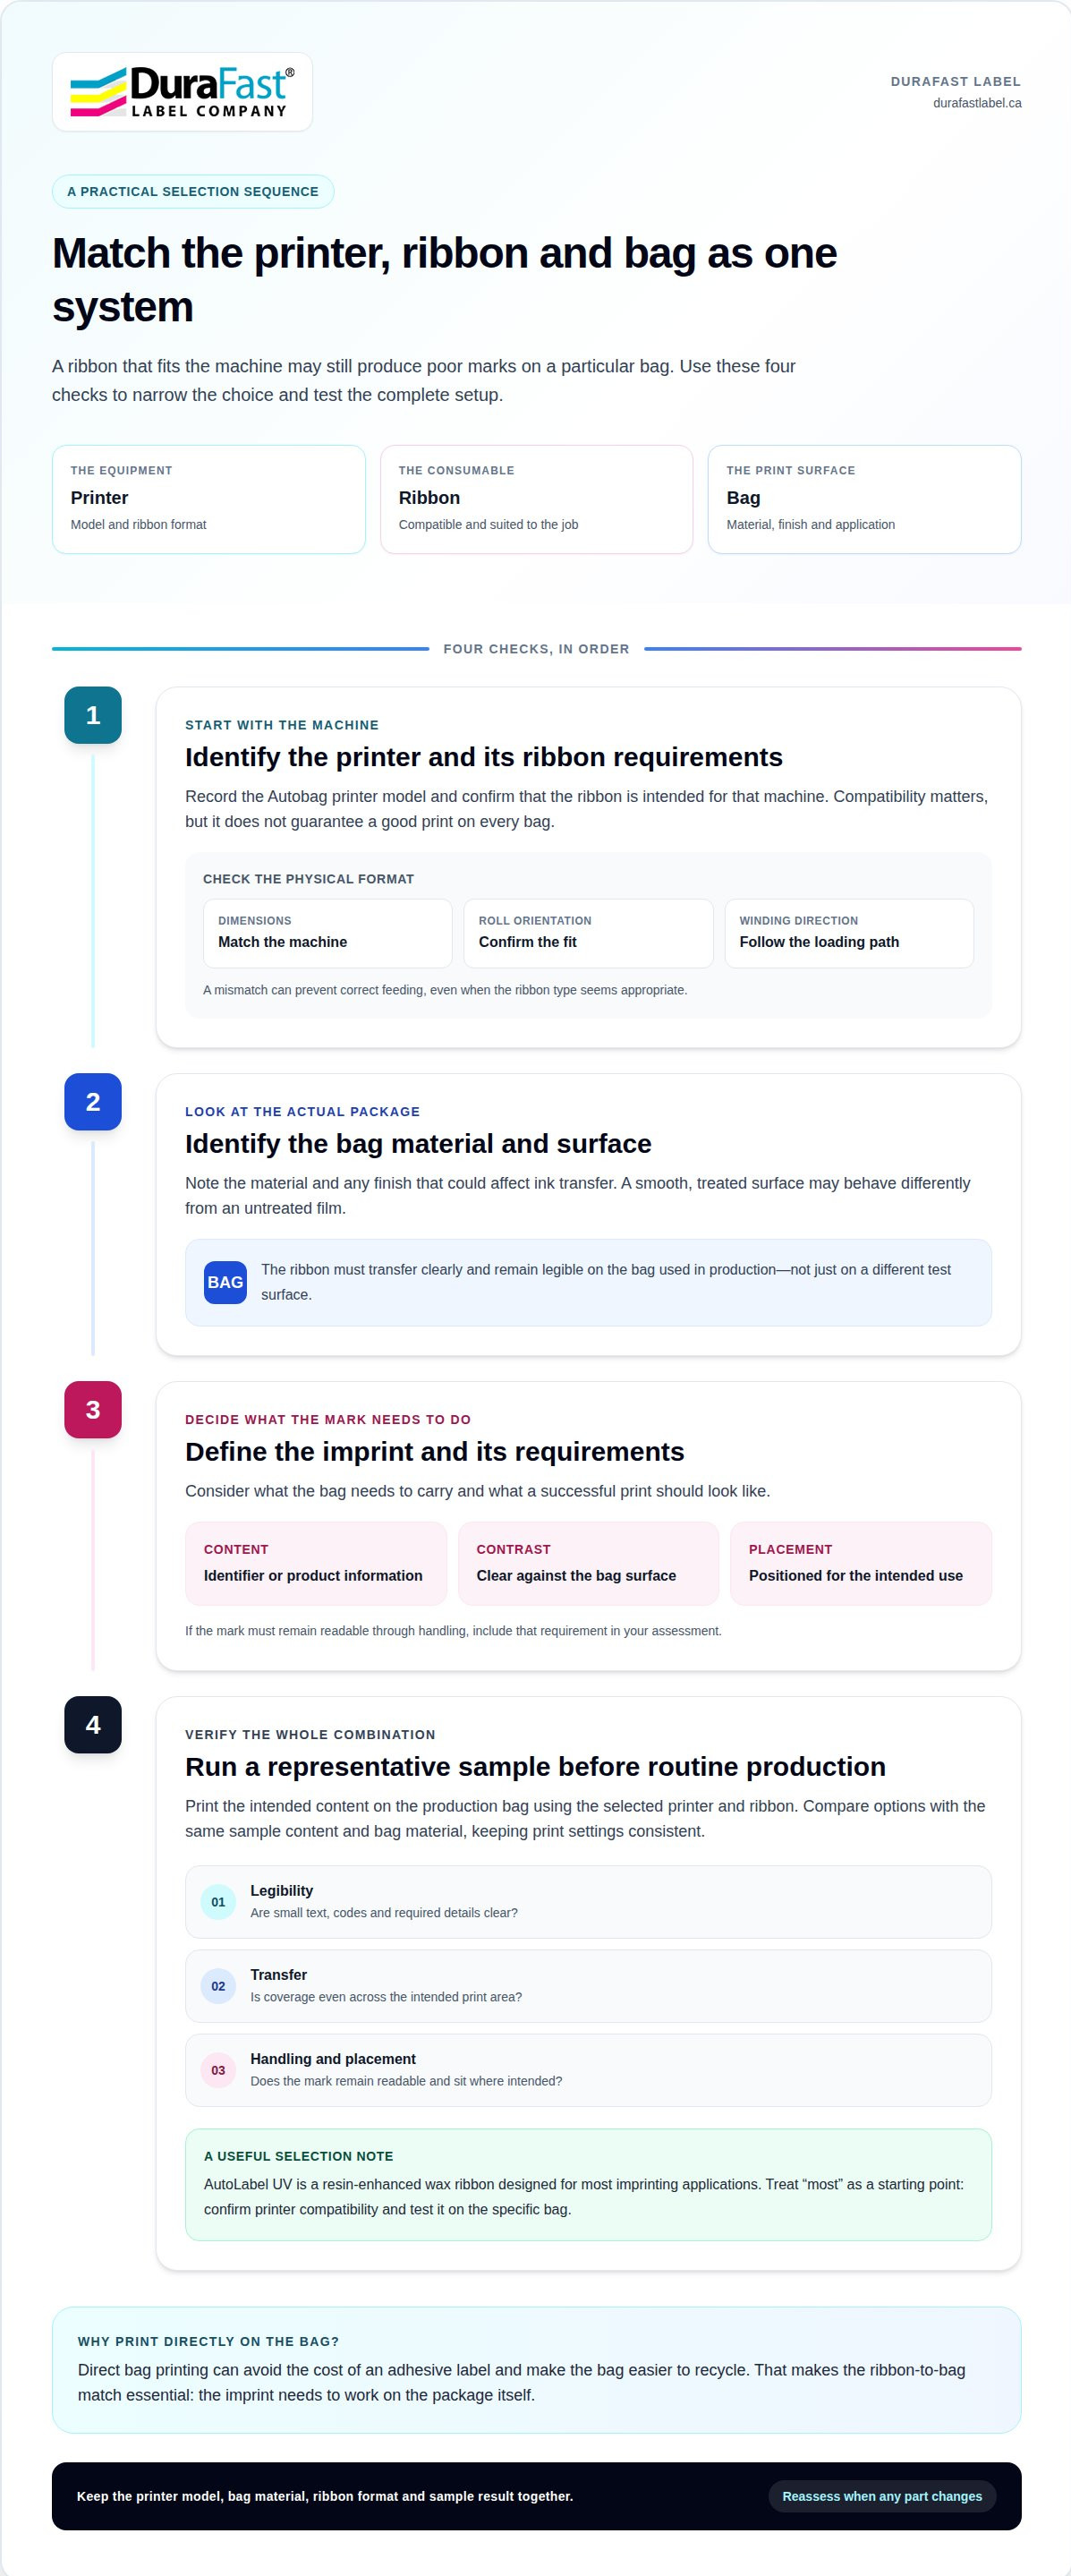
Treat the printer, ribbon and bag as one system. A ribbon may fit a machine yet produce poor marks on a particular bag surface. Start with the Autobag printer model and its specified ribbon format, then consider the bag material and the information the imprint needs to carry.
Are compatible or third-party ribbons suitable for Sealed Air Autobag machines? Yes, if the ribbon is intended for the specific printer and suits the bag and application. Compatibility alone doesn’t guarantee print quality, so assess the complete combination rather than choosing by ribbon name alone.
Use this sequence to narrow the choice:
- Identify the printer. Record its model and ribbon requirements. Confirm the ribbon’s dimensions, roll orientation and winding direction match the machine’s loading path. A mismatch can prevent correct feeding, even if the ribbon type seems appropriate.
- Identify the bag surface. Note the bag material and any finish that could affect ink transfer. For example, a smooth, treated surface may behave differently from an untreated film. The ribbon must transfer clearly and remain legible on the actual bag.
- Define the imprint. Decide whether the bag needs a simple identifier, product information or a mark that remains readable through handling. The content, print contrast and placement all influence what a successful test looks like.
- Run a representative sample. Print the intended content on the production bag using the selected printer and ribbon. Review legibility, transfer consistency and placement before moving into routine production.
Printing directly onto a bag can eliminate the cost of an adhesive label and make the bag easier to recycle. In this setup, the ribbon-to-bag match is essential: the imprint must work on the package itself, rather than on a separate label surface.
AutoLabel UV is a resin-enhanced wax ribbon designed for most imprinting applications. “Most” is a starting point, not a substitute for matching the ribbon to the specific printer and bag. Testing a sample with the intended text and packaging lets you compare the result with your requirements.
For a purchasing decision, keep the printer model, bag material, ribbon format and sample result together. If any of these changes, reassess the combination. Use those details to guide your ribbon selection and avoid a mismatch between the machine’s feed requirements and the bag’s print surface.
What are the differences between wax, wax-resin, and resin Autobag ribbons?
Ribbon types differ in their ink formulation and the marks they’re designed to produce. Wax ribbons use a wax-based coating, wax-resin combines wax and resin, and resin ribbons use a resin-based coating. The right choice depends on the Autobag printer’s requirements, the bag surface and the conditions the printed mark will face.
Wax is a starting point when the required imprint is straightforward and the bag surface accepts the transfer. Suitability depends on the specific film and printer setup. Don’t assume a clear result on one bag will transfer equally well to another material.
Wax-resin blends the two coating types and can offer a middle ground between wax and resin formulations. That alone doesn’t establish how it will perform on every bag. The surface, intended use and printer settings still matter. A sample print helps assess whether the combination delivers the clarity and durability the application needs.
Resin formulations are generally selected for applications that need more durable marks. However, resin isn’t automatically the best choice for every Autobag job. Suitability depends on the film and the printer’s compatibility requirements, so match the formulation to the material rather than choosing by resin content alone.
AutoLabel UV is a resin-enhanced wax ribbon designed for most imprinting applications. Its name describes a particular formulation, not a guarantee that it suits every printer or bag. Confirm that the printer supports the ribbon, then assess the mark on the packaging used in production.
Compare the options using the same sample content and bag material. Keep the print settings consistent, then review:
- Legibility: Check whether small text, codes and other required details are clear.
- Transfer: Look for even coverage and gaps across the intended print area.
- Handling: Assess whether the mark stays readable during the handling expected in your process.
- Compatibility: Ensure the ribbon formulation and format suit the specific Autobag printer.
These observations help distinguish a formulation issue from a mismatch involving the bag or printer. If the mark is unclear, changing ribbon type without controlling the other factors can make the result harder to assess. Keep a record of the ribbon type, bag material and printer settings for each successful sample. For help with the selection, discuss your Autobag ribbon requirements.
Install or replace Sealed Air Autobag printer ribbon
Ribbon replacement depends on the Autobag printer model and threading path. Follow that machine’s operating instructions for access points, roll orientation and routing. A generic diagram can be misleading if its spindle layout differs from your equipment.
Before starting, identify the printer model and the ribbon specification used for the job. Set the new roll beside the machine and compare its width, core and winding direction with the current supply. This helps prevent a roll that fits the spindle but feeds incorrectly.
Use this sequence as a preparation and installation framework, following the model-specific instructions for each physical step:
- Pause the packaging run. Allow the current job to stop before opening the ribbon area. Keep the bag material and printed job details nearby, so you can resume with the same setup.
- Locate the ribbon path. Use the machine’s diagram to identify the supply position, printhead path and take-up position. Note how the used ribbon is wound before removing it.
- Remove the spent roll. Follow the equipment instructions to release the used ribbon and its core. Keep loose ribbon away from the bag path, where scraps could interfere with feeding.
- Load the replacement. Place the supply roll in the specified position. Route the ribbon across the print area and onto the take-up point exactly as the diagram shows. Don’t guess the coated side or winding direction.
- Check the path before restarting. Confirm the ribbon lies flat, follows the guides and has no twists or loose folds. Close the access area as directed by the machine instructions.
- Run a test imprint. Use the intended bag material and print content. Inspect the result for gaps, smearing or misalignment before returning to the regular packaging run.
A change in ribbon width or winding direction can affect feeding even when the roll appears to fit. A clean installation also won’t fix a mismatch between the ribbon, bag surface and print settings. If the test imprint differs from the previous run, note what changed before adjusting the setup.
Record the printer model, ribbon type and successful settings together. For example, note whether the replacement roll used the same format as the previous one and whether the test mark remained legible on the production bag. This makes repeat changes easier to diagnose without relying on memory.
If the model-specific threading path or replacement format is unclear, get guidance on your Autobag ribbon setup before changing the machine’s established routing.
How can you troubleshoot poor print quality or ribbon breaks on an Autobag machine?
Start with the symptom and change one variable at a time. A faint code, smeared text and a snapped ribbon can point to different parts of the setup. Before making adjustments, record the Autobag machine model, ribbon type, bag material and print settings.
Pause the run before inspecting the ribbon path. Follow the machine’s operating instructions when accessing the print area, removing ribbon or cleaning components. This keeps troubleshooting grounded in the equipment’s actual layout rather than a generic diagram.
Use the visible result to guide the first checks:
- Faint or incomplete marks: Inspect whether the ribbon is threaded correctly and lies flat across the print area. Check that its format suits the printer and that the bag surface matches the intended application.
- Smudged or unclear text: Look for loose ribbon, wrinkles or contact between the ribbon and bag. Confirm the ribbon path and settings against the machine instructions before changing print parameters.
- Uneven coverage: Compare the mark across the full print area. If one side is weaker, inspect alignment and tension, then check whether the bag is tracking consistently through the machine.
- Ribbon breaks: Stop the job and inspect the ribbon for creases, tears or a twisted path. Check that the supply and take-up rolls are seated and that the ribbon follows each guide correctly.
- Faults after a roll change: Compare the replacement roll’s width and winding direction with the printer requirements. Re-thread it using the model-specific diagram, then test with the same bag and print content.
Next, isolate the cause. Keep the bag material and print content unchanged while correcting a threading issue. If the ribbon remains intact but the print is still poor, examine the print surface and settings. Changing the ribbon type, bag and settings at once makes it difficult to identify which adjustment helped.
For example, if small text loses clarity after a change in bag material, print the same text on the previous material. A clear result may indicate that the new material is affecting transfer. If both samples look poor, revisit threading, alignment and machine settings.
Follow the Autobag manual for printhead care and approved cleaning methods. Don’t scrape the printhead or use an unapproved cleaning product. Keep a troubleshooting record with the model, ribbon, bag and symptom, such as “faint code on new film.” This helps distinguish recurring faults from a one-time loading error.
Resume production only after a test imprint is legible and the ribbon feeds smoothly through the machine.
What storage conditions and shelf life apply to Autobag ribbons
Storage can affect how an Autobag ribbon feeds and transfers its coating. Keep each roll in its original packaging until use, and store it in a clean, dry area away from direct sunlight, dust and heat sources. These steps help protect the ribbon before it reaches the machine.
There isn’t one universal shelf life for every ribbon formulation. Follow the date and storage guidance on the product packaging, and use the ribbon within the stated period. Formulation, packaging and storage conditions all affect how well a roll performs over time.
Organize inventory so older stock is used first. Record the product name, lot or batch identifier, receipt date and any shelf-life information printed on the package. This gives the team a practical way to identify which roll to issue next, without relying on an opened package’s appearance alone.
- Keep rolls protected: Leave unused ribbon in its original wrapper or box. For example, don’t leave a spare roll exposed beside a running Autobag machine.
- Choose a stable storage spot: Use a clean storage area away from direct sun, moisture and heat-generating equipment. Avoid locations where dust or debris can settle on packaging.
- Handle rolls carefully: Keep ribbon rolls in their packaging while moving them between storage and the machine. Avoid crushing the roll or letting the ribbon edge scrape against a hard surface.
- Track stock rotation: Mark incoming cartons with their receipt date, then place older eligible stock where it will be selected first. Keep the package’s printed date visible.
- Inspect before loading: Check the wrapper and roll for visible damage, contamination or creasing. If the package is torn or the ribbon looks compromised, set it aside rather than feeding it into production.
Before loading a stored roll, compare its label with the Autobag printer requirements. Proper storage doesn’t make an incompatible ribbon suitable for the machine. Confirm the ribbon type and format, then test it on the intended bag material. Check the print for clarity and make sure the ribbon feeds smoothly.
If a roll was stored outside its package or in a damp, dusty area, note that in the stock record. Compare its test result with a properly packaged roll of the same type. This controlled comparison helps distinguish storage-related changes from printer, bag or setup issues.
Use the packaging guidance as the reference for shelf life, and keep storage records alongside the ribbon inventory. Get help with Autobag ribbon selection and storage for your packaging workflow.
DuraFast Label Company Canada: Sealed Air Autobag Ribbons
DuraFast Label Company Canada offers Sealed Air Autobag Ribbons for operations that need to match the ribbon to the bag material and printer requirements. Consider these ribbons when selecting a supply for an Autobag machine or replacing a production roll. Have the printer model, ribbon format and bag surface in mind as you narrow your selection.
DuraFast also offers VIPColor, Afinia and Toshiba label printers. These are separate printer options, so choose them for your label-printing needs, not as substitutes for an Autobag ribbon setup. Keeping the equipment and consumables requirements distinct makes the next purchasing decision more straightforward.
For help with your Autobag ribbon requirements, contact DuraFast Label Company Canada.
Put your ribbon choice into practice
A consistent bag-printing setup starts with a clear record of your equipment and packaging. Keep the Autobag printer model, selected ribbon and bag material together with the production test result. This gives your team a practical reference when replacing a roll or assessing a packaging change.
For your next decision, focus on the priority: machine compatibility, print performance on the bag or the condition of the stored ribbon. Matching that priority to your production needs helps keep purchasing decisions grounded in your workflow. If your operation also needs colour label printing, DuraFast Label Company Canada offers a wide selection of specialized label printers and supplies.
For help with your Sealed Air Autobag Ribbons requirements, contact DuraFast Label Company Canada. A well-matched setup is a practical step towards smoother, more dependable packaging work.
Frequently Asked Questions
Where can businesses in Canada buy genuine Autobag ribbons?
Canadian businesses can purchase Sealed Air Autobag Ribbons from DuraFast Label Company Canada. For a smoother selection, have the Autobag machine model and the ribbon currently used in production at hand. Those details help identify the relevant ribbon for your packaging setup and distinguish Autobag ribbons from thermal transfer ribbons intended for other printer brands.